Design
We recommend the custom web page is tested thoroughly on a real kiosk device to make sure it works and looks good. The kiosk will always show our default cancel and confirm buttons at the bottom. The custom web view is then positioned above filling the remaining space. The width will always be 1080 pixels. The height is 1728 pixels if no virtual keyboard is displayed, and 1293 pixels if the virtual keyboard is displayed. The virtual keyboard is static for the custom web view, so it must either be displayed the whole time or hidden the whole time. The confirm button will be displayed in the brand color of the customer, so it is recommended to use the same color as the primary color on the web page. The button will be disabled by default and will be enabled when the website calls the specific callback (see below). The font used in the app is Source Sans Pro. The default body text is 32px, titles are 52px and bold, and small text is 24px. Here are the most common UI elements of the app in their actual size: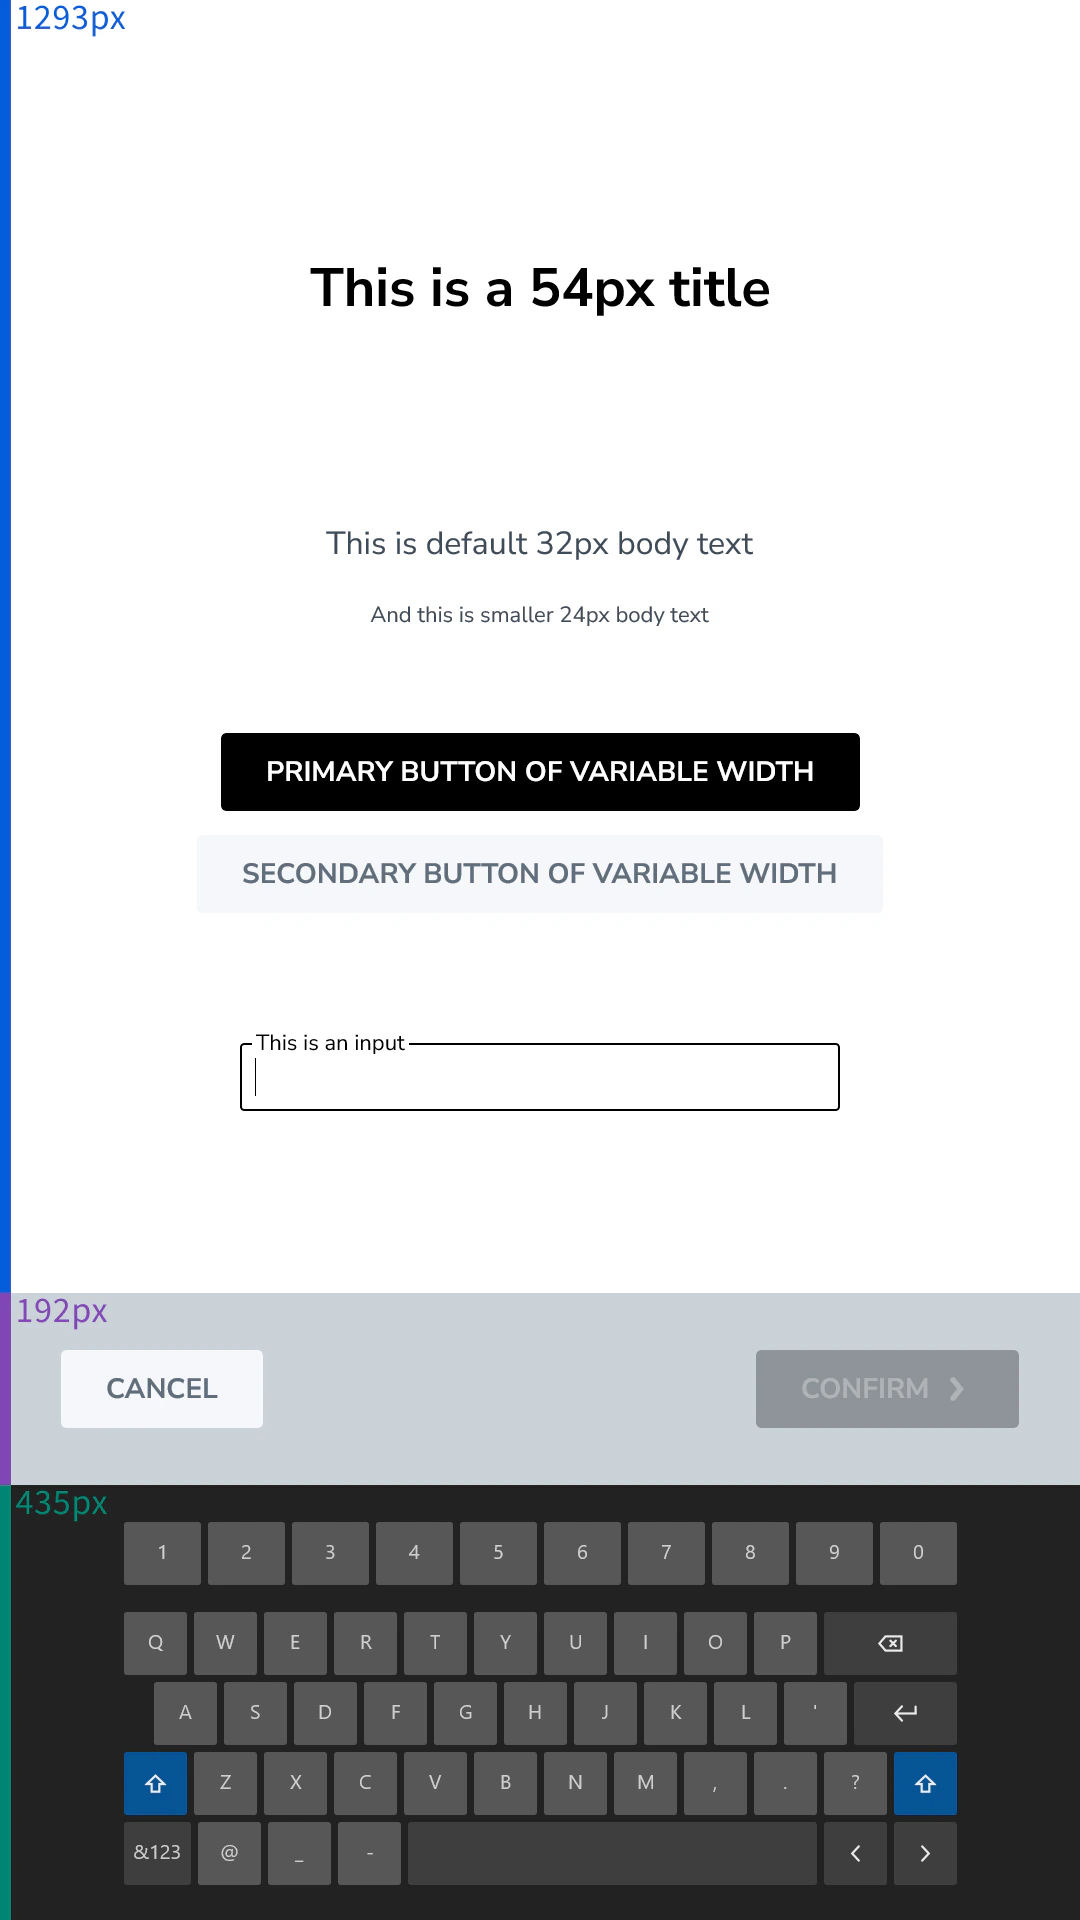
Getting Information from the Kiosk App
The kiosk passes information to the web page in two ways:- Basic guest information can be passed via a URL query parameter (only first name, last name, birthdate, company name, and the guest language).
- The kiosk injects a global
essentryobject into the web page that you can access from JavaScript. This global object has one property (essentry.checkIn) that holds all information from our standard serialized check-in object. - The
essentryobject also contains aconfigurationfield. This is an object of key-value pairs that are configurable by the admin via the essentry dashboard. One use case for this data is to add authentication a public website.
Sending Information to the Kiosk App
The kiosk injects a globalessentry object into the web page that you can access from JavaScript. The object has the following callback methods:
essentry.submitAndConfirm(data)will submit the provided data and trigger the kiosk to go to the next screen immediately.essentry.submitAndEnableConfirm(data)will enable the confirm button and wait for the user to confirm until the provideddatais submitted. This can be used to build a simple confirmation flow. If this function is called multiple times, the data from the last call is submitted.essentry.disableConfirm()will disable the confirm button again, so that the user cannot proceed with the check-in. This can be used in cases where the user invalidated their data entry again.essentry.onUserInteraction()should be called whenever the user interacts with the web page. The kiosk app would otherwise cancel the check-in process after some time without user interaction.
data must be an object with the following properties:
- An optional
customFieldsthat follows the the standard custom fields structure.